Author Topic: Creating and Adding Set Icons - A Visual Guide  (Read 16780 times)

browarod

  • Guest
  • Trade Count: (0)
Creating and Adding Set Icons - A Visual Guide
« on: November 14, 2014, 05:29:07 PM »
+1
For this project you'll need Paint.Net which is a free image-manipulating software. You can download it here.


Step 1: Create your icon in Paint (or Paint.Net if you want). Remember to keep it fairly simple as the final icon on the bottom of the card is pretty small.
-The icon itself should be solid white and the background can be any solid color other than white (black is the easiest but you could do red or green or blue or any non-white color).
-You'll want to keep the height of the icon as the largest measurement (i.e.: keep the width smaller or the same size as the height). An icon that fits in a square will look the best (though Rock of Ages proved that a cross can look good, too).
-Save the image as a .png file. You can select PNG in the "Save as type" box when saving your icon or add .png to the end of the card name (like you did with .jpg in the card creator). The icon file MUST be saved as a .png file otherwise it will not work as intended later.


Step 2: Open Paint.Net and load both your card and the icon file you made.


Step 3: Choose the Selection Tool from the Tool palette and highlight a square around your icon cutting out as much of the empty background as you can.


Step 4: Press CTRL+SHIFT+X on your keyboard to cut out the portion of the image which is outside the square you made in Step 3. This removes the extraneous background and makes the icon easier to work with.


Step 5: Select the Magic Wand tool from the Tool palette and click anywhere in the solid color of your background. Then press the delete key to remove that content (it should change to a grid of white/gray squares).
-If you have multiple sections of background like I did simply highlight each one and press delete until you're left with only the white parts of your icon.
-Save your icon file (click the disk icon).


« Last Edit: November 14, 2014, 05:36:45 PM by browarod »

browarod

  • Guest
  • Trade Count: (0)
Re: Creating and Adding Set Icons - A Visual Guide
« Reply #1 on: November 14, 2014, 05:31:03 PM »
0
Step 6: Unless you drew your icon with pixel art and already tiny you'll need to scale it down to fit on the bottom of your card. Go to the Image menu and select Resize...
-I've found that resizing it to about 30-35 pixels of height usually provides a good-sized icon.
-Save your icon.
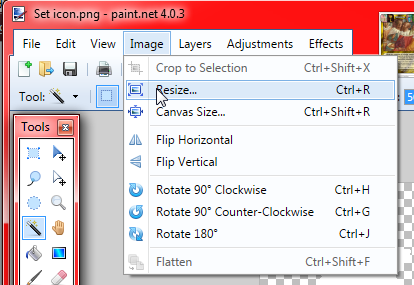
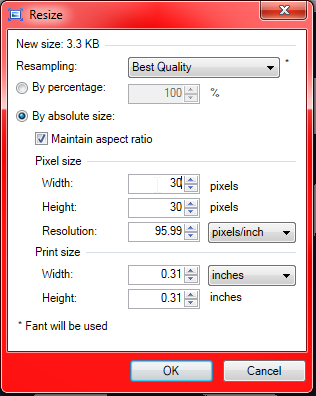
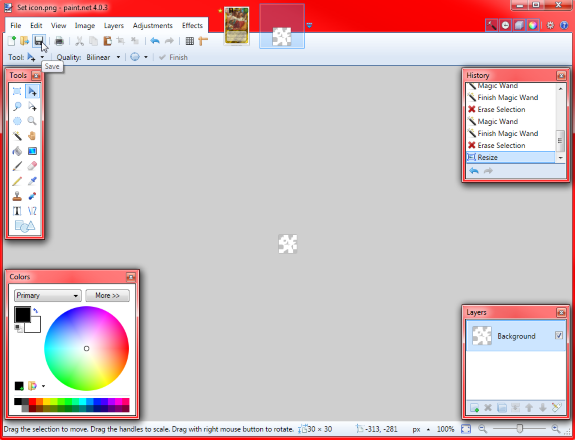


Step 7: Switch to your card image in Paint.Net and use the Zoom tool from the Tool palette to zoom in (you'll be working with your tiny icon so this helps you with moving it around).
-After selecting the Zoom tool you will have to actually click on your image to zoom in. 2 or 3 clicks should be enough.
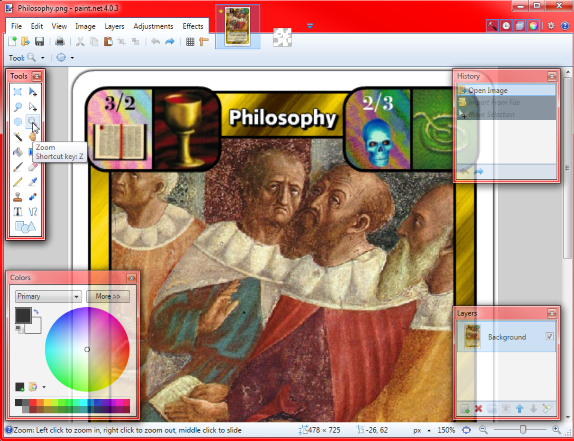


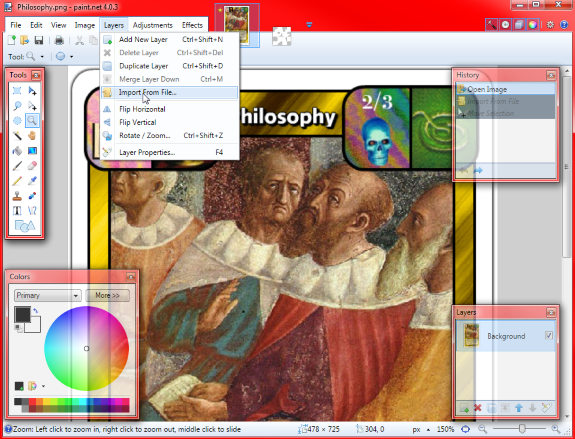
Step 8: Go to the Layers menu option and select Import from file...
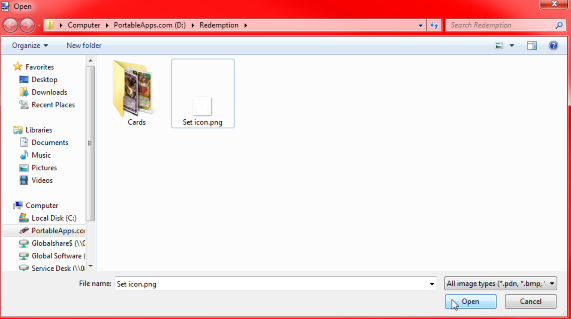
-Find the location where you saved your icon and select that to import.
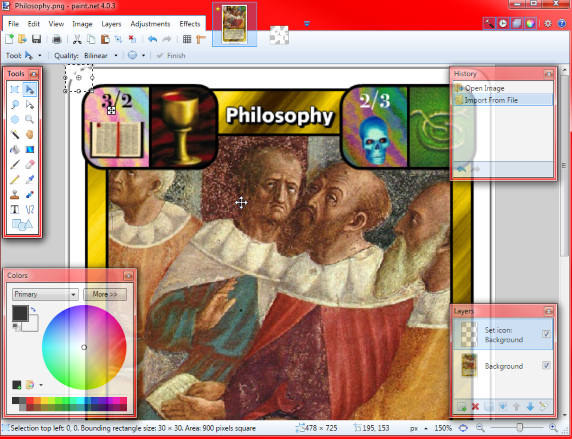
-This imports your icon as a layer on top of the card itself. This allows you to move it around without messing up the card image.
-Your icon will show up with a box around it at the top left of the card image.


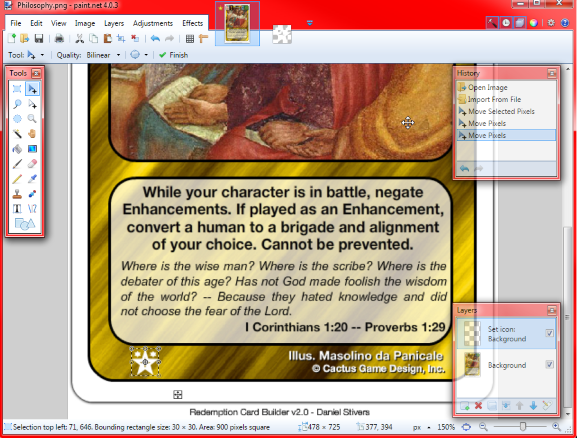
Step 9: Drag the icon to the bottom left area of the card and get it positioned.
-The example below shows roughly where the Early Church icon is located on the new set.


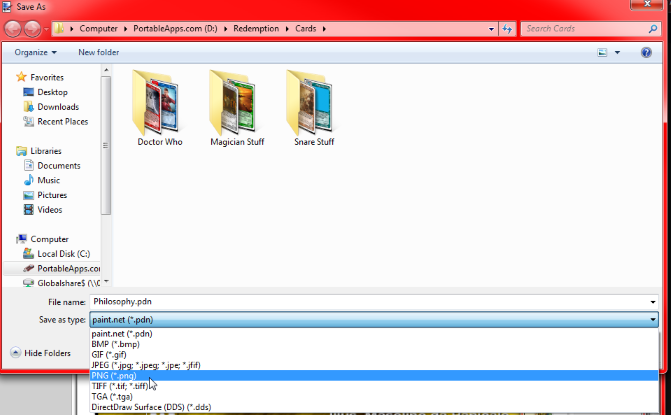
Step 10: Save your new card image. By default Paint.Net will want to save it as a .pdn (Paint Dot Net) file because you have multiple layers. If you want to be able to edit the image further (if you decide that you need to move the icon around a little bit more, for example) you can save a copy of it as a .pdn
-In order to have a copy of the image to upload and share on the message board you'll need to save either a PNG or JPEG (JPG) version of the file (you can select either of these from the "Save as type" option).
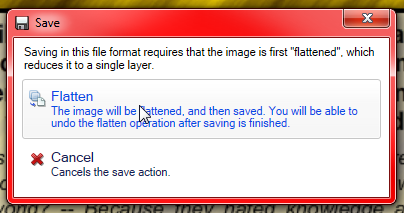
-When saving as a JPG or PNG it will ask you to flatten the image (because you can't have layers with JPGs and PNGs). Go ahead and do so.


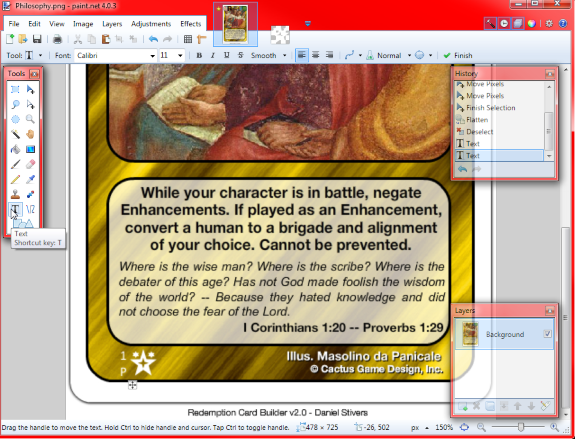
Optional Step: If you're feeling really adventurous you can also add the card number and/or rarity next to the set icon with the Text tool from the Tool palette.
-I don't know what font Cactus uses for the card number/rarity but Paint.Net defaults to Calibri which seems to resemble it.
-I used a font size of 11 for the card image below.


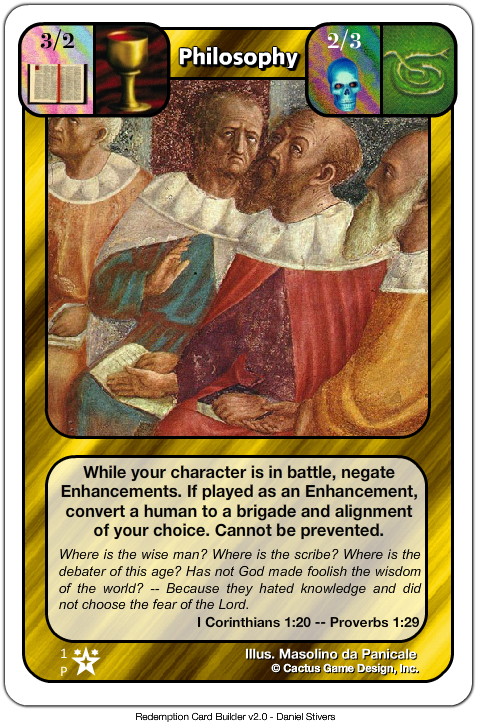
Finished Card: Congratulations, you've now got a card with your very own set icon!
« Last Edit: November 14, 2014, 07:09:31 PM by browarod »


SimplePortal 2.3.3 © 2008-2010, SimplePortal